How To Deep Clean Hydro Flask?

How do I clean my Hydro Flask the right way?
Hydro Flask water bottles are beloved among sports and nature enthusiasts, yet after some time, they can become coated in limescale and emit foul smells. A deep cleaning may be the solution to such an issue!
In this post, I will demonstrate how to properly and safely clean a hydro flask at home using cost-effective tools without endangering our bodies with harmful chemicals.
Let’s do this! When you are ready to learn how to properly care for and extend the lifetime of your bottles, read on.
Part 1 – Why It Is Necessary to Keep Bottles Clean
The cleanliness of your hydro flask is of utmost importance if you wish to ensure its beautiful aesthetics. Without proper cleanup, beverage residue inside can become an ideal breeding ground for bacteria and microorganisms, potentially infiltrating your body with harmful microbes that could have devastating repercussions for its wellbeing.
Keep your flask clean and functioning smoothly to maintain optimal temperatures for beverages stored inside. A regularly cleaned bottle will protect its temperature longer, while insufficient cleaning may lead to an unpleasant aroma and taste, lower thermal insulation, or reduced insulation performance.
Bottle Cleaning | Preserving Appearance and Functional Condition
Tiny organisms found within bottles may pose severe threats to your health.
A well-insulated bottle will maintain your drink’s ideal temperature over an extended period.
Unblocked Water for Healthy living environments
Hydro flasks help preserve the quality of water for an extended period. But without regular and thorough cleaning, bacteria and other potentially harmful organisms may flourish inside and compromise water quality.
Clean Erlenmeyer bottles are essential to producing nutritious water. Your health relies on the quality of water you put in them; therefore, routine hydraulic flask cleaning should be part of your wellness regime.
Clean your hydraulic flask every week if you use it regularly; this will prevent microbial growth while improving the taste of your water.
Cleaning the hydro flask regularly will not only preserve its condition but will also help to eliminate bacteria and germ risks.
Remember to regularly clean your bottle, especially if it contains drinks, as this could lead to bacteria growing within it. A narrow neck allows air and moisture to escape, and without regular washings of your bottle, this could eventually lead to germs and bacteria developing – an unhygienic situation indeed!
Keep in mind that to protect against the growth of bacteria and germs, you should leave drinks in jars for a short time. Otherwise, water can get into the lids, leading to their filling and damaging the inner surface.
Always thoroughly cleanse every corner of the vial to eliminate viruses lingering inside, which could cause illness.
Part 2 – How to Keep Bottles Clean After Every Use
Please pay special attention when using it for optimal hygiene and to prevent your hydro flask from collecting dust and bacteria.
Step 1: Clean the bottle using water and soap. Fill a warm water basin and add a small amount of liquid soap, such as dish detergent, to clean your bottle and eliminate dirt or scents. Please avoid using abrasive materials such as sponges that could damage its coating.
Step 2: Rinse the vial thoroughly with hot water to remove all soap residue and help maintain its quality. Performing this step should leave no soapy traces behind that could lower its rate or compromise its integrity in any way.
Step 3: Dry the Vial. Allow your bottle to rest on a clean kitchen towel for several hours until completely dry, using an ice bath to speed up drying time and achieve faster bottom drying times. For wider-neck hydrous lessons, add more ice cubes so they can help dry faster at the base of the bottle.
Step 4: Completely dry the bottle by placing it on a surface without humidity fluctuations, such as a table.
Follow these simple tips to maintain a clean and durable hydro flask.
Part 2.1: Clean Your Bottle With Hot Water
One of the easiest and simplest ways to clean a hydro flask is with hot water, as this will eliminate any unpleasant odors and remove any food or drink residue collected on it.
- Pour hot water into the Erlenmeyer until it reaches 50 to 30% temperature.
- Close and shake the lid well for best results.
- Pour in water and repeat this action several times.
- If the interior of an Erlenmeyer remains dirty, you can use a sponge and soapy water to cleanse it further. After that, make sure that it’s thoroughly washed in hot water before being placed back into storage.
Subchapter 2.2: Use a soft bristled brush and detergent solution
The hydro flask requires both a soft brush and cleaning liquid for optimal cleaning results. Be mindful when selecting your brush; one which won’t damage its interior will ensure maximum effectiveness.
Start by placing a small amount of detergent into the bottle. Next, slowly pour warm water until you reach 50% of your field bottle size; close and shake the Erlenmeyer to mix the detergent and water thoroughly.
Utilizing a soft bristled brush, carefully wipe the interior of the bottle, including its neck and top lid, using circular motions. Also, make sure to clean its exterior surface.
Once your hydro flask has been thoroughly cleansed, pour in some detergent and use clean water until it’s colorless. Be sure to dry off your hydro flask before reusing it! Congratulations: you’ve just given your hydro flask the care it deserves.
Chapter 3 – Clean Bottomless Cleaning of a Hydro Flask at Home
During its use, a hydro flask may accumulate fragrances or impurities that cannot easily be rinsed away with water alone. When this occurs, it may be necessary to conduct a deeper cleanse in order to properly purge it of any contaminants that accumulate over time.
Step one of this method requires heating the water to boiling before allowing it to cool to lukewarm. Step two involves adding 1 teaspoon of baking soda into your hydro flask before pouring in your prepared water, making sure to close and stir the solution carefully before closing its lid and mixing thoroughly.
Dependent upon the severity of contamination, withdraw the sodium bicarbonate solution for several hours. Drain any leftover liquid before thoroughly rinsing the vial with a sponge or cloth. Soft brushes or glass cleaners may also thoroughly clean their interior surfaces if dirty vials exist.
Ensure that any special plastic or rubber vial components are undamaged during cleaning! If there are any specific pieces, such as buttons, hinges, etc, that need special care during handling or storage.
Now that your Hydro Flask is fully prepared to use, don’t forget to give it the attention it requires in terms of maintenance to extend its lifespan and preserve its condition for as long as possible.
Chapter 3. 1: Mixing Acetic Acid and Baking Soda
Step 1: Combine 2 teaspoons of baking soda and one teaspoon of acetic acid in a measuring pump.
Step 2: Add hot water until your Erlenmeyer reaches 1/4 full, and close its lid.
Stage 3: After turning your Erlenmeyer upside-down and shaking it a few times, leave it standing for several minutes so the baking soda and acetic acid solution has time to penetrate its pores and treat its stains and odor.
Stage 4: Remove the lid and pour out the solution from your Erlenmeyer.
Step 5: After using hot water to thoroughly clean out the bottle, set it aside on top of a book to dry before reuse.
This method for cleaning the hydrofull will certainly assist in eliminating any stains or odors from its bottle.
Chapter 3, 2: Utilizing the Cleaning Pill
Cleaning size pumps using dental cleansing pills is an increasingly popular and efficient method. It works especially well on bottles with poor taste.
First, place the pill in a vial with hot water, cover and allow to stand for a few hours before pouring water and rinsing with clean water to complete this step.
For maximum effectiveness, pills containing active explorers to combat viruses and odors will do wonders to cleaning the bottle while eliminating its offending smells. This method not only rids itself of its annoying aromas but also completely purges any debris left inside.
Before applying the method provided, it is important to remember that before using a vial thoroughly, the vial should first be thoroughly washed with hot water in order to rid itself of pill remains and any pill remains. Frequent use of this method should be avoided so as not to damage its interior coating of a vial.
Be certain that the cleaning agent does not contain harsh preparations that could harm the surface of the vial. Keep in mind, however, that this method is not considered environmentally friendly; so apply only in recent cases.
Chapter 3. 3: Cleaning Jugs Specially with Cleaning Agents
There are numerous specialized cleaning products recommended for hydraulics that are effective, delicate, and capable of not only dislodging impurities from bottles but also maintaining their original aesthetic over time.
Some of the more well-known cleaning products for hydro flasks include antimicrobial wipes.
Hydro Flask Bottle Brush
Is a special cleaning tool that thoroughly cleans the interior of a hydro flask bottle, eliminating all types of dirt without harming its surface. Additionally, its wide neck handle makes cleaning comfortable.
Hydro Flask Cleaning Kit
Is a set of accessories for fast, efficient bottle cleaning without damaging surfaces. This set consists of a bottle brush, cleaning agent bottle, and nylon scratch protector to safeguard the exterior of bottles from scratches and wear and tear. With its help, bottles can be quickly and effectively cleansed using this set.
Buttle Bright
Is an effective cleaning product for hydrons that quickly dissolves all manner of impurities including beverage and food debris, quickly. Plus, this odorless formula makes this ideal for sensitive skin types.
At all times, read and follow the instructions when using any cleaning agent, taking note that not all solutions are appropriate for different kinds of hydroflasks – choose wisely!
Chapter 4 – Tips to Keep Bottles Clean to Prevent Contamination
Once you’ve carefully cleaned out and emptyed out your hydro flask of all contents, it is time to consider ways to keep it hygienic and ready for use.
First and foremost, it is important to realize that the closed end of a bottle serves not only to maintain optimal beverage temperatures but also to protect its contents from outside influences. Therefore, open bottles should never be left outdoors as this exposes their contents to possible infections from environmental sources. Also, make sure your bottle is securely sealed so no air leakage occurs if placed behind doors or in vehicle trunks.
Keep it away from sources of heat or flame, such as stoves, fireplaces and the sun; high temperatures may destroy the substance within and release unpleasant flavors or aromas into the bottle.
To avoid contamination of bottles, care should be taken to avoid direct contact with dirty surfaces or objects like trash cans or waste materials. A clean, dry bag or book bag are great places to store vials.
Chapter 4.1: Avoid contact with sharp or hard objects
To ensure that hydro flasks remain in tiptop condition, sharp or hard objects must be avoided as much as possible in order to reduce any chance of scratches or cracks appearing on its surface.
When packing field bottles into bags or bookbags for transport, it is highly advised that they be packed separately in order to prevent possible punching during transport.
Note that cleaners containing abrasive particles could damage the surface of a flask, so we advise only using soft sponges or cleaning cloths for cleaning purposes.
Section 4.2: Storing Your Bottle in a Case or Bag
Storing your Hydro Flask in a case or bag helps protect it from scratches, chips, and other damage, and keeps the drink inside from heating or cooling in direct sunlight or cooler locations. Additionally, this protects from accidental spillage of hot or cold beverages inside.
Carrying case selection for water bottles is ultimately up to you, whether that means selecting a zippered pouch, bag with handles or fabric pouch. Consider where and when your bottle will be used – picnic, walk or training session, etc.
Your jacket or bag could provide extra storage space for additional keys, phones or small items that you might leave on the trail.
To provide maximum protection, we advise storing your Hydro Flask in an appropriate case or bag.
Part 5 – Removing Flavors from Hydro Flasks
Hydro Flasks may become smelly over time. Here are a few techniques that should help get rid of these smells more effectively.
Baking soda is one of the most effective odor control strategies. Simply pour boiling water into a vial and add one teaspoon of baking soda, close and shake to mix the solution, leave for several hours, then rinse out using water.
– Acetic acid. Combine equal parts water and acetic acid and pour into a triangular flask for several hours of standing time before washing with water to clean off residue from the triangular flask. However, when using iron flasks beware that using Acetic Acid could damage the internal coating.
– For optimal results, add lemon juice. Pour boiling water into a triangular flask and combine with the juice from one lemon; allow this mixture to sit for one or two hours, before rinsing thoroughly with water and discarding the triangular flask.
Note that using bleach or chemicals to clean the inside of a Hydro Flask is not advised, as they could damage its coating or trigger chemical reactions that pose risks to health.
Section 5.1: Introduction of Acetic Acid
Acetic acid can be an excellent solution for cleaning meth flasks. Simply mix equal parts acetic acid and water from within the flask before leaving to sit for 10-20 minutes before opening it again.
Flasks were then carefully and naturally dried with plenty of water.
Acetic acid contains outstanding properties:
- First, acetic acid helps eliminate unpleasant odors.
- Second, acetic acid kills bacteria and fungi.
- Thirdly, acetic acid can effectively remove spots.
NOTE! Acetic acid must be used with caution as its surface-active properties could damage the hydraulic flask’s interior surfaces, so be sure to rinse out your bottle after each application of acetic acid.
Section 5.2: Citric Acid Use Case Analysis
Citric acid is an ideal ingredient for cleaning lime and other archaeological fluids without harming the environment or leaving behind chemical remains.
To use citric acid, first, pour hot water into a measuring pump and mix in 2-3 teaspoons of citric acid. Seal and shake well the flask before leaving it sit in your cupboard for 15-20 minutes before taking another look at its content.
Erlenmeyer then ran hot water through his vial, discarding any solution left inside it and wiping any prints off with a soft brush or cloth if any remain on its walls.
This method is perfect for both superficial and deep cleaning of hydrofluid systems, helping eliminate unpleasant odors while eliminating all types of stains.
To simplify the cleaning process, a table illustrating bottle size proportions and required quantities of citric acid may be used as an aid for maximum effectiveness. Regular cleaning sessions should also help avoid Erlenmeyer’s limescale formation.
Flask volume and amount of citric acid
Part 5.3: Mix Baking Soda and Lemon Juice Together for Best Results
If you want a deeper clean for your hydro flask, baking soda and lemon are excellent choices for getting it done efficiently.
- First, prepare pasta by mixing 2-3 tablespoons of baking soda with some water in a small container.
- Next, use this pasta to coat the inside of a bottle.
- Add half a lemon to enhance the effect. This amount should suffice for medium sized bottles that you place inside vials.
- Close and shake the bottle thoroughly so that all of the mixtures is distributed evenly within it.
- Let it rest for several hours (not overnight), then rinse thoroughly under running water before leaving to dry naturally.
Cleaning with baking soda and lemon effectively rids vial walls of dirt accumulation and offensive smells, leaving them with the ability to shine freely.
Answers to Questions
Question: What is the best way to clean a hydro flask?
Answer: To clean the hydro flask, it is best to use a regular cleaning solution or soap that can be purchased at your local supermarket. Do not use abrasive or chemical cleaners as they may damage the surface of the bottle.
Q: How often should I clean my Hydro Flask?
A: The frequency of cleaning the Hydro Flask depends on what fills the bottle. If used for water, washing once a week is sufficient. If you fill it with other drinks, such as tea or coffee, you will need to wash the bottle after each use.
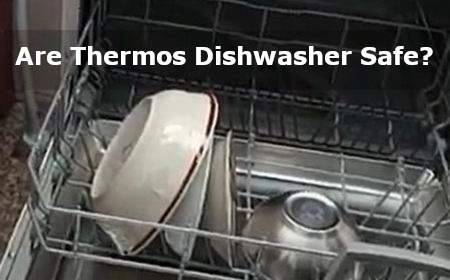
Q: Can I wash my Hydro Flask in the dishwasher?
Answer: Although the Hydro Flask website states that the bottle is dishwasher safe, we recommend that you disregard this cleaning method. Washing the bottle in the dishwasher could destroy the cleaning device inside the bottle.
Question: How do I clean the Hydro Flask after using it for other drinks?
Answer: To clean the Hydro Flask for other drinks, fill it with hot water and add a small amount of sodium bicarbonate. Cover the bottle, stir, and let stand for several hours. Then wipe with a dry cloth and rinse with clean water.
Question: How do I get fragrance from the hydro flask?
Answer: If you notice an unpleasant odor inside the hydro flask, we recommend filling it with hot water and adding a small amount of vinegar or lemon juice. Let sit for a few hours, then rinse with clean water and dry with a dry cloth.